Make preparations:
1. Download and install Limewire
2. Download and install the free iSquint converter
3. Download and install Aiseesoft DVD Ripper for Mac
Part 1: Where and how to download the free sources of video.
Part 2: Introduce a kind of free software for you to put the video that you download from Youtube or other web sites on mac into ipod.
Part 3: How to convert DVDs to iPod/iPhone/Apple TV/PSP/MP4 Player and other portable devices on Mac
Part 1: When and how to download the free sources of video
First I introduce some free video/music lists. Here include most of the sources that you want and you can download them freely: http://macdvdtoipod.com/free-video-music.html
Then I will show you how to use Limewire to download free music and video to computer:
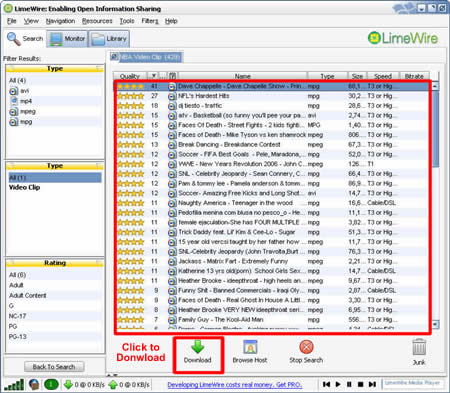
Step1: Run the Limewire: Just type in some key words that you want to search, choose the type, and press search, then you can get a lot of files to download.

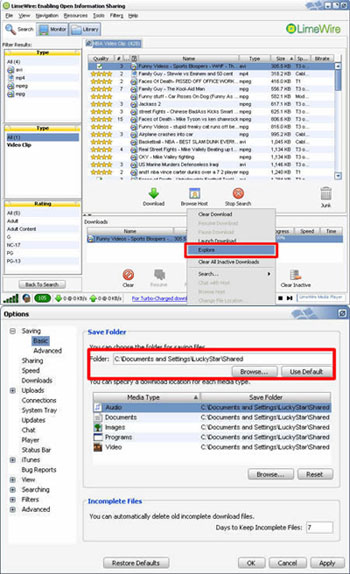
Step 2: Find the just file and click download to get it. You can also download multiple files in one time. After you download the file, then right-click on the download file and choose “explore”, then you can find your file. You can also Option, then you can set the default downloaded directory. Click tool folder for saving your file.

Part 2: Introduce a kind of free software for you to put the video that you download from Youtube or other web sites on mac into ipod
Step 1: Install isquint and open it.
Step 2: Go to a video page of Youtube and pause it as soon as it starts to play. You can only download the video if it has not played or buffered all the way.
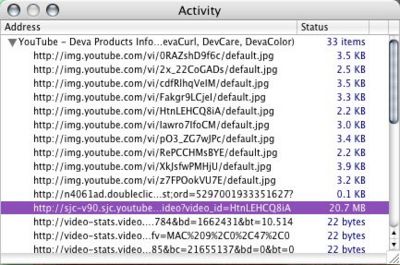
Step 3: Open the Activity window in Safari- go to Window>Activity
If you use Mozilla Firefox, you can download the Add-On UnPlug and use it to obtain video and audio which is embedded on a webpage (get_video file). Once you've downloaded the program, click on the green fish in the upper right hand corner. Click on the link containing "get_video" above the text "Type: Flash Video Data (this is probably the one you want)" to download the file.
Step 4: Click the drop down arrow. There should be a file still downloading- it should be the largest. Double click that file to download the video. A new blank page will open in Safari.

Step 5:Wait for the video to download as a blank paper icon. It will appear on your desktop as "get_video".
Step 6:Rename the file to something more descriptive
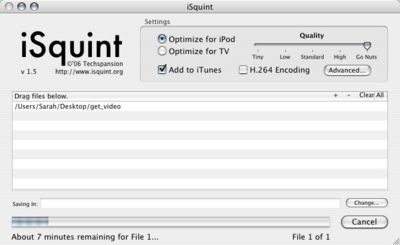
Step 7: Drag the video into the open area in the middle of iSquint. Be sure to check "Add to iTunes" and "Optimize for iPod" if you want to put the video on your iPod. There are going to be some other options you can chose from, so customize all you want.

Step 8: Click "Start" and wait for the conversion. The saved file will probably change to a Quicktime MP4 video on your desktop. You may have to drag the MP4 file into your "Movies" in iTunes manually
Tips: Instead of going to Window>Activity hit command>alt>A to get there quicker
Part 3: How to convert DVDs to iPod/iPhone/Apple TV/PSP/MP4 Player and other portable devices on Mac
You just need to download a good Mac DVD Ripper or Mac DVD Converter program. Below is quick tutorial using Aiseesoft DVD Ripper for Mac.
You can rip your DVD's on Mac according to these steps below:
Step1: Install and run DVD Ripper for Mac
Step2: Import DVD Movies
1. Click the “Load DVD” button, select the folder of your DVD movie, and click OK. If the movie is on your disc drive, you can just select the drive and click OK.
2. Or click the “Load IFO” button, open the folder of your DVD movie, and you will find two folders in it: AUDIO_TS and VIDEO_TS. Open the VIDEO_TS folder, select all the IFO files, and then click OK.
After the movie is loaded, you can see all the chapters and titles in it, and then you can check the ones you want to convert. If you want to convert the whole movie, you can just keep all the titles or chapters checked.
Step 3: Output Settings
After your DVD movie is loaded, you can start to set output settings:
1. Select an encoder type from the format drop-down list according to the device you want to put the video on.
2. Click the “Settings” button to set the video and audio parameters.
3. Select the suitable subtitle and audio track for the titles/chapters if you want.
Note: You can click the “Merger” button to join all the selected DVD titles/chapters into one file instead of creating a separated file for each title/chapter.

Step 4: Click the Convert button to start the conversion.
All you need to do now is to wait for the conversion to be finished. The remaining time will be shown on conversion window for your reference.
Some Tips:
1. Trim Movie
If you just want to convert a clip from your DVD movie, you can click the Trim icon to capture a clip. In the Trim window, you can trim the length of the current title/chapter by either dragging the Start Time and End Time sliders or setting the time parameters in each corresponding field.

2. Crop Video
If your DVD video has black sides, you can use this Crop function to remove them. Click the Crop icon to open the Crop window, and set the video crop area by dragging the crop frame or setting the four crop parameters (Left, Top, Width, and Height).

3. Movie Effect
If you want to change the original video effect, you can click the Effect icon to set the video brightness, contrast, saturation, hue, and even audio volume.

Now you can enjoy you portable devices freely. Have fun! |

